Bearings during an electric motor repair: selection and fitting
  1. // ELEKTROPROMREMONT
  2. Bearings during repair

Bearings during an electric motor repair: selection and fitting

A capital repair of an electric motor almost always involves pulling the end shields and lifting the rotor off its bearings. At that point the bearings are open to inspection in a way they never are while the machine is running — which is exactly why the "replace or keep" decision made during a repair is different from the one made during routine diagnostics on a running machine.

"How to test electric motor bearings" covers how to find a faulty bearing by temperature, noise, vibration and ultrasound. This article covers a different stage: what happens to a bearing during the repair itself, once the replacement decision has already been made or is about to be — selecting the replacement, the removal and fitting technique, the condition of the seats, and lubrication during reassembly.

Mistakes at this stage rarely show up right away. A bearing hammered onto a worn seat, or packed with the wrong grease, can run for a few weeks or months and fail only after the motor has already been handed back into service — at which point a second teardown costs far more than the bearing itself ever would have.

Why bearings are replaced at every capital repair, not only when faulty

During a capital repair the machine is already stripped down, the rotor is off its bearings, and the end shields are off. The bearing itself is usually a small fraction of the total repair cost, while tearing the same motor down again a few months later — because a bearing left in "just in case" failed — means a second disassembly, a second alignment job, downtime, and often collateral damage to the shaft or the winding when a ring or cage fails catastrophically.

That is why standard capital-repair practice is to replace both bearings regardless of whether prior diagnostics turned up a clear defect. Leaving a bearing in place should always be a deliberately justified exception, never the default.

  • a bearing that has run its full interval between overhauls has used up its rated life even with no obvious symptoms of a fault;
  • hidden defects — early spalling, a hairline crack in a race, localized metal fatigue — are not always visible from manual rotation and a bare-eye inspection without stripping the bearing down;
  • removal itself, whether by puller or by heat, loads the rings and cage, so refitting a bearing that has already been pulled without a full inspection is a gamble;
  • a new bearing costs nothing next to an unplanned production stoppage from the machine failing again soon after the repair;
  • replacing it during the capital repair is the only chance to check and, if needed, recondition the seats on the shaft and in the end shields — work that cannot be done without pulling the bearing.

Leaving a pulled bearing in service is acceptable only as an exception — for instance, a bearing fitted very recently with confirmed low running hours, provided the races, cage and fit are fully inspected after removal. It should never be a routine way to cut costs on a capital repair.

Selection criteria for a replacement bearing

Fitting "whatever looks the same" without checking the full designation is common and dangerous. A proper replacement is chosen on several independent criteria at once, not just the outside dimensions of the part that came off.

CriterionWhat to check
DesignationThe full bearing designation — type, series, bore and outside diameter, width, precision class, design features — or a verified equivalent from another manufacturer with identical geometry and performance
Load typeRadial, axial or combined load; a belt or gear drive that adds radial load; a vertical machine carrying axial load from the rotor’s own weight
SpeedThe bearing’s limiting speed for the chosen lubricant type against the motor’s rated speed, with margin
Sealing and lubricationA sealed bearing with grease pre-packed for life versus an open bearing for relubrication; whether the grease passage and grease fitting in the end shield are functional
Internal clearanceThe radial clearance class matched to the interference fit, operating temperature and load type of the assembly
Fit classShaft and bore tolerance matched to which ring rotates relative to the load vector and to the magnitude of that load

On machines with a belt or gear drive, the extra radial load from belt tension or gear mesh can call for a bearing with a higher load rating or a different series than the one on the coupling end. In vertical machines one bearing typically carries the axial load from the rotor’s weight and has to be chosen for exactly that duty — fitting a bearing rated for radial load only in that position leads to fast race and rolling-element failure.

A sealed bearing is convenient where access for relubrication is limited, but it cannot be topped up and has a finite life for the grease sealed inside it; an open bearing under grease requires a working grease passage, a functioning grease fitting, and a proper relubrication schedule. Swapping one type for the other without reviewing the end shield’s seal design can either let grease leak out or starve the bearing.

The fit class depends on which ring rotates relative to the load: a ring rotating relative to the load vector needs an interference fit, a stationary ring needs a light clearance or transition fit. Getting the fit wrong is one of the most common hidden causes of a new, correctly sized bearing failing early.

Removing the bearing

A bearing that is going to be scrapped still needs to come off carefully — damage to the bearing itself no longer matters, but a rough removal almost always transfers to the shaft or the housing bore, both of which go straight back into service with the new bearing.

The right tool is a mechanical or hydraulic puller that loads the inner ring when pulling off a shaft, or the outer ring when driving it out of a bore — never the rolling elements or the cage. Using a chisel, a hammer or a bar directly against the ring or the housing deforms the race, the ring or the seating surface even when the bearing itself is headed for the scrap bin — a deformed ring can seize on the shaft, strip the puller’s jaws, or damage the fillet and shoulder of the shaft.

If the bearing has a heavy interference fit and won’t come off the puller without excessive force, the fit is relaxed by controlled heating — an induction heater or an oil bath — bringing the inner ring to a temperature that releases the interference while the shaft itself stays relatively cool. An open torch flame is not suitable for this: local overheating changes the metal structure of the shaft and ring, and uneven heating distorts the seating surface.

  1. 01Record the designation, orientation and visible condition of the bearing before removal, especially if a specific type of defect is suspected.
  2. 02Clean the fit area of dirt, paint and burrs that would stop the puller seating evenly.
  3. 03Set the puller jaws or a bearing separator against the inner ring for shaft removal, or a support against the outer ring for driving it out of a bore.
  4. 04Relax the interference with controlled heat if needed, monitoring temperature with a thermocouple or temperature-indicating crayon.
  5. 05Apply force evenly and in line with the shaft axis, never letting the puller cock sideways.
  6. 06Inspect the shaft journal and the housing bore immediately after removal for burrs, metal transfer and signs of ring creep.

Fitting the new bearing

Hammering an interference-fit bearing on cold through a makeshift drift is one of the most common causes of a new bearing failing early. The blow transmits force through the rolling elements onto the races, leaving microscopic dents — so-called false brinelling — that rapidly turn into real fatigue spalls once the bearing is loaded.

The correct way to fit an interference-fit bearing onto a shaft is to preheat the ring — with an induction heater or an oil bath — to a temperature that gives the bore the thermal expansion needed, checked with a thermocouple or a non-contact thermometer. The heated bearing then slides freely onto the shaft with no hammering, seats against the shoulder, and is held in position until it cools and the fit fully tightens.

Where the interference is light and the bearing is pressed on cold, force must always be applied through the ring that is actually being press-fitted — via a drift or a tube of matching diameter bearing on the face of that ring, never the opposite one. Pushing force through the ring that stays stationary relative to its fit, let alone through the rolling elements or the cage, deforms the races before the bearing has even started running.

Bearings with an asymmetric design — thrust bearings, tapered rollers, ones sealed on one side only, or ones marked for a specific mounting direction — have a defined orientation; fitting them the wrong way changes the intended contact angle of the races or blocks the grease supply to the working zone. After fitting, the shaft should turn smoothly by hand, with no binding, grinding or uneven resistance around the circumference — any unevenness points to a cocked ring, contamination, or damage picked up during the press fit.

Before fitting a new bearing, the heating tool, drifts and seating surfaces all need to be clean — even fine swarf or grit pressed in along with the ring becomes the seed of future spalling on the race.
Journal and bore condition, and seat reconditioning

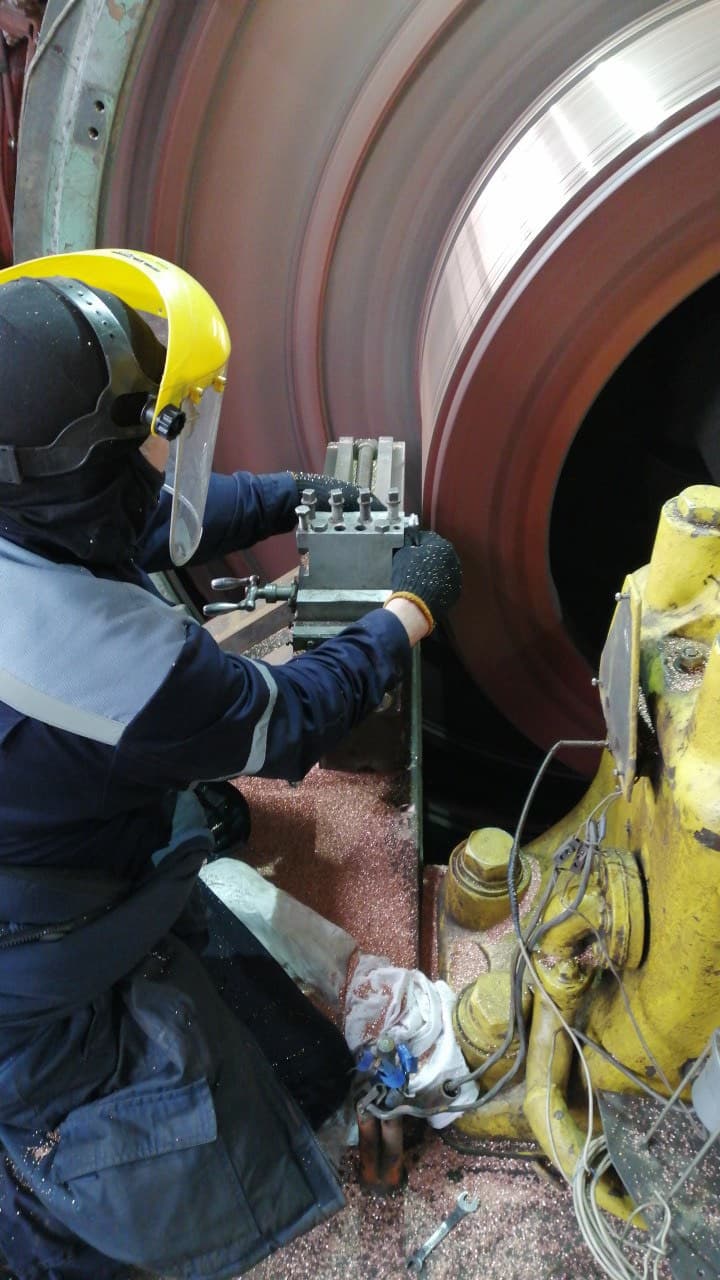
A new bearing fitted onto a worn seat will not run long no matter how good the bearing itself is. Before fitting, the shaft journal and the end-shield bore must be checked with a micrometer and an internal gauge for diameter, ovality and taper, and inspected for burrs, metal transfer, signs of ring creep — a shiny or discolored band, brown or red metallic dust — and corrosion.

If the actual size is outside the tolerance for an interference or clearance fit, the seat needs restoring, not compensating for by picking a bearing with a different internal-clearance group. On a shaft, the main options are thermal spray or weld build-up followed by grinding back to the nominal size, or fitting a repair sleeve onto a shaft turned down for it. In an end-shield bore, besides boring out to a repair size and pressing in a bushing, a lighter-duty fix sometimes used is retaining the ring with an anaerobic cylindrical-fit compound of the Loctite type — acceptable as a supporting measure for a bore with only minor wear, but no substitute for proper geometric restoration where wear is significant or the load is shock-loaded.

The detailed method for checking shaft geometry — choosing the measurement datum, building a run-out map along the shaft, and how run-out differs from imbalance — is covered in "How to measure electric motor shaft run-out." The company’s general approach to weld build-up, metallizing and machining seating surfaces is the same regardless of which assembly is being repaired.

Lubrication during reassembly

The grease type and quantity are matched to the specific bearing, not eyeballed. For a grease-lubricated rolling bearing, a rough rule of thumb is filling about a third to a half of the free space in the housing — the exact figure depends on speed and bearing size: the higher the speed, the smaller the share of the cavity that should be filled.

Too little grease causes dry friction, faster wear on the races and cage, and rapid overheating. Too much grease is just as harmful: the excess gets churned by the rolling elements, adds resistance to rotation, and the churning itself generates heat — a bearing packed "for good measure" often runs hotter than one that was short on grease.

The thickener and base-oil type must suit the assembly’s speed, temperature and seal design; mixing greases with incompatible thickeners without checking compatibility can thin or harden the blend and destroy its lubricating properties. Grease goes into a cavity that is clean of old grease and metal dust, worked evenly between the rolling elements rather than smeared as a solid layer only on the cover.

Bearing life, shaft alignment and rotor balancing

A correctly selected and correctly fitted bearing does not, by itself, guarantee long service. If the rotor is out of balance after the repair, or the shaft is coupled to the drive through a misaligned coupling, the bearing runs under extra dynamic load that its rated life was never designed to absorb.

Rotor imbalance creates a rotating centrifugal force that acts on the bearing at running speed, cyclically loading the races even under a nominally correct static load on the assembly. Coupling misalignment after installation adds extra radial forces to the bearings and, depending on the coupling type, axial forces as well — neither of which is accounted for in the bearing assembly’s design. In both cases the bearing — even a new one, correctly selected and correctly fitted with the right interference — fails far short of its rated life, and accelerated bearing wear is frequently the first visible sign of uncorrected imbalance or misalignment.

For that reason, a bearing replacement done during a capital repair should always be followed by dynamic rotor balancing, and, once the motor is back at its site, by laser or dial-indicator coupling alignment. Both operations are covered in "How to perform rotor balancing."

What not to do

  • fitting a new bearing by hammering it through a makeshift drift, or directly against the ring;
  • transmitting installation force through the rolling elements or the cage instead of the ring being press-fitted;
  • reusing a pulled bearing without inspection just because it "looks fine";
  • choosing a replacement by outer size alone, ignoring fit class, clearance group and seal type;
  • fitting a new bearing onto a worn or unchecked seat on the shaft or in the end shield;
  • heating a bearing with an open torch flame instead of an induction heater or oil bath;
  • packing grease "for good measure" beyond the recommended free-space volume;
  • mixing greases with different thickener types without checking compatibility;
  • running the motor under load right after a bearing replacement without checking alignment and balance.

Frequently asked questions

Are bearings always replaced during a capital repair?

Yes, that is standard practice — replacing both bearings is part of a normal capital repair regardless of whether prior diagnostics found a clear defect. Leaving one in place is acceptable only as a justified exception, after a full inspection.

Can a bearing from a different manufacturer be fitted?

Yes, if it is a verified equivalent with the same dimensional designation, precision class, internal clearance group, seal type and load rating — not a bearing chosen only by outer dimensions.

How much grease should go into a bearing?

Roughly a third to a half of the free space in the bearing housing — the exact figure depends on the bearing size and speed. Too much grease causes overheating just as too little does.

Can a bearing be fitted cold, without heating?

Only if the interference is light and the bearing is pressed on with a drift bearing against the ring being fitted, without hammering. A heavy interference fit requires heating the bearing.

How can worn shaft seat be identified?

Signs include a shiny or discolored band on the seating surface, brown or red metallic dust, an out-of-tolerance micrometer reading, and evidence of the inner ring creeping on the shaft.

Can a bearing that has been removed be refitted?

Generally no. The exception is a bearing fitted quite recently, with confirmed low running hours, removed carefully and fully inspected afterward.

Does rotor balancing affect bearing life?

Yes. An unbalanced rotor or a misaligned coupling puts extra dynamic load on the bearing, and even a correctly selected and fitted bearing will then fail far short of its rated life.

Bearing replacement as part of a capital repair

EPR (Elektropromremont) replaces bearings as a standard part of the scope of a capital repair of an electric machine, not only when the customer specifically requests it. The replacement is selected against the machine’s nameplate data and the actual designation of the bearing removed, and the seats are checked, and reconditioned where needed, before the new bearing is fitted.

The scope of work includes:

  • selecting a bearing by designation, load type, speed and fit class;
  • removing bearings with a puller or controlled heating, without damaging the shaft or the end shield;
  • inspecting and measuring the seats on the shaft and in the end shields;
  • restoring seats by weld build-up, metallizing or fitting repair sleeves;
  • fitting bearings with induction heating and checking internal clearance;
  • lubricating according to the bearing type and speed;
  • dynamic rotor balancing and alignment after reassembly.

Important disclaimer

This material is for informational purposes. The values, diagnostic methods, scope of work and recommendations given here are general and do not replace the manufacturer’s technical documentation. The final decision for a specific machine is made from its own diagnostics and inspection, taking into account its type, power, design, duty, operating history and applicable standards.

Planning a capital motor repair?

We select and fit bearings with seat reconditioning where needed, and carry out rotor balancing and alignment — so the new bearing runs its full service life.

Get a consultation